Friday, November 30, 2018
how to make dosa
Dosa Recipe (with Step by Step Photos)

For thin and crispy Dosa, well prepared Dosa Batter is key to its taste and texture and its preparation is very easy – first soaked rice and urad dal (black lentils) are ground individually into smooth batter and then its mixture is allowed to ferment overnight. Dosa batter prepared in this recipe can be used for the making most of the Dosas mentioned above as well other South Indian staple food items like Paniyaram, Uttapam etc.
Preparation Time: 14 hours
Cooking Time: 25 minutes
Serves: 4 servings
Ingredients:
3/4 cup Parboiled Rice (idli-dosa rice)
3/4 cup Regular Rice
1/2 cup Whole Urad Dal (without skin) or Split Urad Dal (black lentils)
1/4 teaspoon Fenugreek Seeds (methi dana)
1/2 tablespoon Chana Dal (gram lentils), optional
Water, as needed
Salt to taste
Oil, for shallow frying
Directions:
1.

2.

3.

4.

5.

6.

7.

8.

9.

10.

11.

12.

13.

14.

Tips and Variations:
Please note that rice requires less water compared to urad dal while grinding them into a batter.
Number of hours required to ferment the batter depends on the weather condition. In summer, batter is fermented within 6-8 hours but in winter it takes up to 12-14 hours.
Make sure that batter is not heated up while grinding; this is required to make sure that it ferments properly. Grind the rice and dal in batches to prevent batter from heating up if you are making batter in large quantity.
Chana dal is added to give dosa a golden color.
To prevent dosas from sticking to the pan,
Grease the tava/ griddle properly with oil before making the first dosa.
Make sure that tava is hot enough before spreading the batter. To check whether tava is hot enough or not, sprinkle few drops of water on the surface and if the water drops sizzle and evaporate within few seconds, tava is ready.
Don’t forget to wipe the tawa with a clean wet cloth before spreading the batter for each dosa.
Fermented dosa batter can be stored in the refrigerator for up to 3-4 days.
If you are using the refrigerated dosa batter, take it out from the refrigerator and wait for at least 30-minutes before starting to make dosa.
Taste: Crispy and Savory
Serving Ideas:Serve paper dosa with white coconut chutney and vegetable sambar in the breakfast or in the dinner. It can be also served with red coconut chutney and green coconut chutney.
Thursday, November 29, 2018
How to treat and prevent ingrown leg hairs
How to treat and prevent ingrown leg hairs

Ingrown hairs have grown back into the skin. This often creates an inflamed red bump or dot that may itch or cause pain. An ingrown hair may also become infected, forming a pimple-like wound.
Ingrown hairs can be more common in people with coarse or curly hair. They may also be likelier to occur when the hairs are very short, such as after waxing, shaving, or tweezing. Ingrown hairs occur more frequently in areas that experience a lot of friction.
Most ingrown hairs on the legs do not cause complications, and they usually resolve on their own. A few simple home remedies can help.
In this article, we describe how to safely remove ingrown hair on the legs and prevent the issue from recurring.
Getting rid of an ingrown hair

Ingrown hairs can occur after waxing or shaving.
Many ingrown hairs will resolve over time without treatment. It is often best to let them heal on their own and take preventive steps.
However, if a person can see the tip of the hair outside the skin, it may be easier to pull the hair out and allow the follicle to heal.
To remove an ingrown hair safely:
- Wash the area with mild soap and warm water. If the area is not irritated, gently exfoliate it.
- Apply a warm, wet washcloth over the ingrown hair. This can help open the follicle and allow it to drain.
- Hold the washcloth in place for 1 minute, then remove it.
- Using a sterilized needle or tweezers, gently tease out the rest of the hair.
- When the entire hair is above the surface of the skin, use the tweezers to grab its base. Pull firmly upward to remove the hair.
- Wash the area again with warm, soapy water, and apply a warm washcloth if needed to help soothe any irritation.
Do not try to pick out an ingrown hair that is under the skin. This can lead to infection. It may also push the hair deeper into the skin, increasing the time it takes to heal.
Prevention
Use the following methods to help prevent ingrown hairs:
Exfoliation
Dirt, oils, and dead skin cells can clog the hair follicles. Removing these can treat and help prevent ingrown hairs.
Exfoliation before shaving can help. Scrub the legs with an exfoliating body wash or use a loofah to help remove dirt and unclog pores.
Exfoliation also gently scrapes away the dead skin cells that accumulate on top of the skin. This layer of dead cells can trap new hairs inside the follicles, causing them to grow inward.
Also, gentle exfoliation is sometimes enough to pull ingrown hairs up and outside the skin, where they can grow correctly.
Try a dry brush
Dry brushing is a way to get rid of dead skin cells. Brushing the skin with a firm, long-bristled brush in a circular motion can gently scrape away the outer layer of dead skin cells, revealing softer skin underneath.
Removing this layer can also keep the pores and follicles clear and prevent hairs from growing inward.
Use shaving cream or gel

Using shaving cream or gel can help to prevent ingrown hairs.
Shaving cream adds moisture and reduces friction when the razor glides over the skin.
Too much friction can result in irritation and inflammation. It may also cause razor burn, in which the skin becomes bumpy, red, and sometimes painful. By reducing friction, shaving cream reduces the risk of irritation.
The type of shaving cream can also make a difference. Sensitive skin may react to ingredients in some creams.
Chemicals and fragrances in shaving creams can irritate and inflame the skin, leading to skin issues, such as ingrown hairs.
People with sensitive skin may benefit from using natural or hypoallergenic products on their legs.
Choose the right razor
Ingrown hairs on the legs can signal that a person is using the wrong type of razor.
A good razor should glide gently across the skin, leaving behind no missed or half-shaven hairs. Replace razors regularly to avoid dullness, which can add friction.
Razors that do not glide smoothly can catch and pull hairs, and ingrown hairs can result. A razor that catches can also cause small nicks and cuts, which can become infected.
In the past, some dermatologists believed that single-blade razors reduced risk to the skin. However, a 2013 study showed no difference between single- and multiple-blade varieties.
Shave in the direction of growth
Hairs in an area tend to grow in the same direction. Shaving in the opposite direction can cause the hairs to have very sharp tips. This makes it easier for them to penetrate the skin and grow inward.
Practice good shaving techniques
Some other tips for preventing ingrown hairs due to shaving include:
- Always use a sharp, clean razor, avoiding razors with any signs of rust or wear.
- Rinse the blade after every stroke.
- Shave less often, allowing the hair to grow.
- Clean the blade with rubbing alcohol after each use.
- Do not overuse disposable razors.
Over-the-counter (OTC) products for ingrown hairs
There are some OTC creams and treatments available for people who regularly get ingrown hairs.
These products contain ingredients commonly found in acne medications, such as benzoyl peroxide, salicylic acid, and glycolic acid. When successful, they prevent ingrown hairs by removing dead skin cells and unclogging pores.
Some OTC products may help coax the hair up and out of the skin, which may reduce the risk of infection.
Also, moisturizers can keep the skin from becoming dry, itchy, and inflamed.
Ingrown hairs and waxing

Moisturizing before and after waxing can help to reduce friction.
Some people prefer waxing to shaving. After waxing, the hair may take a longer time to reappear, and it may grow back finer.
Shaving is more likely to cause ingrown hairs, but they can also occur after waxing.
Hydration is key for people who wax their legs. If the skin is dry, waxing can result in brittle hair that breaks at the root, rather than being pulled out entirely.
Ingrown hairs can also result from increased friction that occurs when clothes rub against recently waxed dry skin.
Use a natural moisturizer before and after waxing to reduce friction and keep the skin soft and hydrated. It may also help to wear loose-fitting clothes for 24 hours after waxing.
When to see a doctor
An occasional ingrown hair on the leg is normal. However, if ingrown hairs occur frequently, it may be a good idea to see a doctor.
The doctor may be able to suggest further treatment options. Or, a person may have a skin condition that resembles ingrown hairs.
If a person notices that an ingrown hair is infected, they should see a doctor. The area around the hair may appear to be inflamed or red, or there may be a pus-filled bump. A doctor can treat the infection and keep it from spreading or getting worse.
Wednesday, November 28, 2018
how to activate uan
How to activate UAN
UAN – Know About Universal Account Number

1. Universal Account Number or UAN
Universal Account Number is a 12-digit number, every employer contributing to EPF has. The Employee Provident Fund Organisation (EPFO) allots it. UAN of an employee remains same throughout life irrespective of the number of job he/she changes. Every time an employee switches job, EPFO allots a new member identification number (ID), which will be linked to the UAN. You can put in a request for this new member ID by submitting the UAN to the new employer. Once the member ID is created, it gets linked to the UAN of the employee.| The UAN remains same and portable throughout the life of an employee. Employee shall have different member ID’s generated at the time of changing the job. All such member Id’s are linked to the Universal Account Number of the employee to ease the process of EPF transfers and withdrawals. |
2. How to know your UAN
a. Through Employer
In the normal course, you can easily get your Universal Account Number from your employer allotted to you by the EPFO. Some employers print the UAN number in the salary slips too.b. Through UAN Portal using PF number/member ID
It is possible, that you are unable to get your Universal Account Number from the employer, you can obtain the UAN number through UAN portal also. You need to follow the below steps: Step 1: Go the UAN Portal https://unifiedportal-mem.epfindia.gov.in/memberinterface/ Step 2: Click on the tab ‘Know your UAN Status’. The following page will appear. Step 3: Select your state and EPFO office from dropdown menu and enter your PF number/member ID alongwith the other details such as name, date of birth, mobile no, captcha code . You can get the PF number/member ID from your salary slip. Enter the tab ‘Get Authorization Pin’. Step 4: You will receive a PIN on your mobile number. Enter the PIN and click on ‘Validate OTP and get UAN’ button. Step 5: Your Universal Account Number will be sent to your mobile number.
3. How to activate and login to the EPFO website using UAN?
In order to activate UAN, it is essential that you have your Universal Account Number and PF member id with you. Given below are steps to activate. Step 1: Go the EPFO homepage and click on ‘For Employees’ under ‘Our Services’ on the dashboard. Step 2: Click on ‘Member UAN/Online services’ in the services section. You would reach the UAN portal.
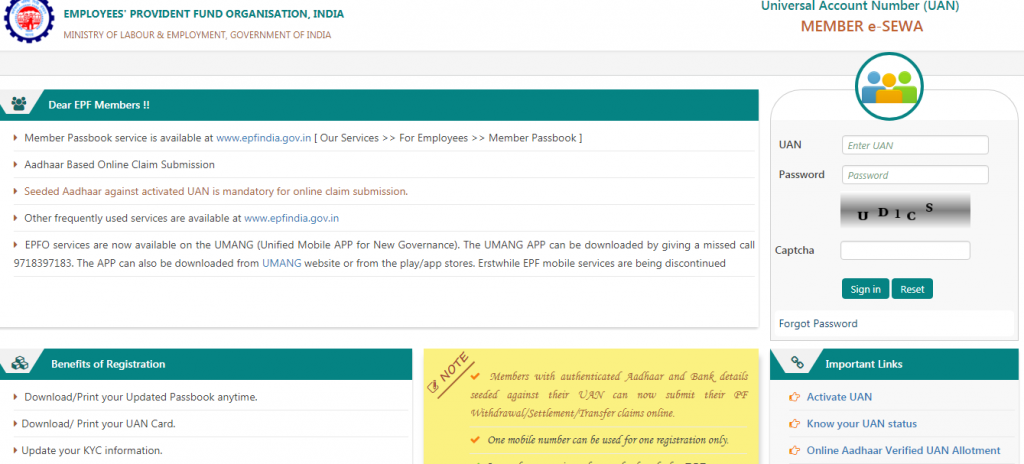
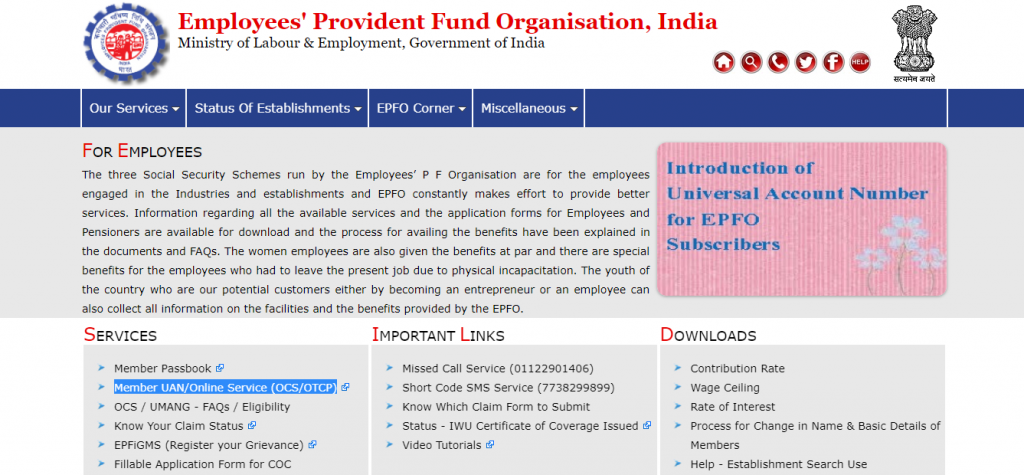 Step 3:
 - Enter your Universal Account Number, mobile number and PF member ID. Enter the captcha characters. Click on ‘Get authorization PIN’ button. You will receive the PIN on your registered mobile number.
- Click on ‘I Agree’ under the Disclaimer checkbox and enter the OTP that you receive on your mobile number and click on ‘Validate OTP and Activate UAN’.
- On activation of the UAN, you will receive a password on your registered mobile number to access your account.
- If you wish to change your password it is possible, when you log into the UAN portal with your Universal Account Number as id and the password you receive on your mobile number.
4. Features & benefits of UAN
- Universal Account Number or UAN helps to centralize employee data in the country.
- One of the biggest use of this unique number is that it brings down the burden of employee verification from companies and employers by EPF organization.
- This account made it possible for EPFO to extract the bank account details and KYC of the member and KYC without the help of employers.
- It is useful for EPFO to track multiple job switches of employee.
- Untimely and early EPF withdrawals have reduced considerably with the introduction of UAN.
5. Advantages of UAN to employees
- Every new PF account with a new job will come under the umbrella of a single unified account.
- It is easier to withdraw (fully or partially) PF online with this number.
- Now the employees themselves can transfer PF balance from old to new using this unique account number.
- Any time you want a PF statement (visa purpose, loan security etc.), you can download one instantly – either by logging in using member ID or UAN or by sending an SMS.
- There will be no need for new employers to validate your profile if the UAN is already Aadhaar and KYC-verified.
- UAN ensures that employers cannot access or withhold the PF money of their employees.
- It is easier for employees to ensure that his/her employer is regularly depositing their contribution in the PF account.
6. Documents required to open UAN
If you have just entered your first job or first job in a registered company, you require the following documents to get your Unique Account Number.- Bank account info – account number, IFSC code, branch name.
- ID Proof – Any photo-affixed and national identity card like Driving License, Passport, Voter ID, Aadhaar, SSLC Book
- Address Proof: A recent utility bill in your name, rental/lease agreement, ration card or any of the ID proof mentioned above if it has your current address
- PAN card – Your PAN Number should be linked to UAN
- Aadhaar Card – SInce, Aadhaar is linked to bank account and mobile number, it is mandatory.
- ESIC card
Tuesday, November 27, 2018
how to make rice water for hair
How to make rice water for hair
How To Use Rice Water For Hair – 2 Simple And Easy Methods To Try

A tumbler of rice is all you need for better hair. Yes, it’s true. Simply soak it in water, and voila! You have rice water for hair treatment, that has been used since ages to solve all your hair problems.
It is Asia’s best kept ancient secret, and you must try it to know why. The best part is you can easily make it at home. Read on to find out how.
What Is Rice Water?
Do you know how to cook rice? Remember how you soak it in water and then strain it? Well, the next time, do not throw the water away because it works wonders on your hair and skin.
Rice water looks like a milky liquid, and that’s because of the starch residue left behind from the rice. It is rich in minerals and vitamins and makes for a healthy drink.
Rice water tightens your skin and improves the health of your hair. It also enhances blood circulation in your body, aids skin cell growth, and keeps your skin looking young and rejuvenated.
Sounds perfect, right? Curious to know how the usage of rice water came about? Read below to find out.
History Of Using Rice Water For Hair

There is a tribe called Red Yao in a Chinese village called Huangluo, popularly known as the land of Rapunzels.
And rightly so because since ages, all the women in this village have been using rice water to wash and nourish their hair. It even has a certification from the Guinness Book Of World Records as the ‘world’s longest hair village’ (2).
And back in the day, it was the same case in another country. The noble women of the Japanese Imperial Court in 800 AD were known for their beautiful long hair, and that’s because – you guessed it right – they washed their hair with rice water.
These traditions were passed on to generations through word of mouth. Time passed by, and with the onset of the world wide web, the world came closer, and beneficial cultural practices were exchanged. As part of that attempt, I am here to enlighten you about rice water as an extraordinary ingredient for hair care.
Is Rice Water Good For Hair?
Yes, it is perfect for hair. What’s in it that makes it so? Studies show that rice water contains inositol, a carbohydrate that repairs damaged hair.
This inositol stays in the hair even after the rice water is rinsed off, acting as a shield and protecting your hair from damage. Rice water also contains amino acids that strengthen the hair roots, increase hair volume, and make your hair shiny and smooth.
In every possible way, rice water is great for your hair. It is safe, natural, and has absolutely no side effects. It improves the condition of your hair in a healthy manner.
Take my word, there’s nothing better than rice water for your hair. Learn more about it in the following sections.
Plain Rice Water Vs. Fermented Rice Water – Which Is More Effective?
Rice water sounds like a seemingly simple entity. But it has a few variations, of which plain rice water and fermented rice water are better known. Let’s figure out which one is better.
Plain rice water’s pH is higher than your hair’s pH (5). Fermentation brings down the pH levels of the rice water to that of your hair and helps close the cuticles, thereby protecting the hair.
Fermenting rice water enhances the existing vitamins and nutrients levels in it, which nourish your hair follicles. It promotes healthy hair growth and improves the overall condition of your hair.
Also, during fermentation, a substance called ‘pitera’ forms in the rice water, and it is rich in vitamins, minerals, amino acids, and organic acids. Pitera is known to promote cell regeneration and keep your skin and hair healthy (6).
Fermented rice water is acidic, and when you rinse your hair with it, it restores and balances the pH of your hair.
Fermented rice water enhances the benefits of plain rice water, and you can use either of them depending on the level of repair and rejuvenation you need.
Methods Of Preparing Rice Water
Here we have mentioned two basics and simple methods to prepare rice water for hair at home and how to use it for hair effectively.
1. Boiled Rice Water
I) What Is Boiled Rice Water?

One way of obtaining rice water is by boiling the rice. The excess water left after cooking rice in water is called boiled rice water. It is a concentrated liquid that you can dilute to use as a face wash or a hair rinse.
II) How To Make Boiled Rice Water
III) How To Use Boiled Rice Water For Hair
Boiled rice water is an excellent conditioner, so let’s figure out how to use it as one.
2. Fermented Rice Water


I) What Is Fermented Rice Water?
Fermented rice water is rice water that is left to ferment for a while before use. Fermentation turns the rice water into a potent liquid that needs to be diluted before use.
II) How To Make Fermented Rice Water?
III) How To Use Fermented Rice Water For Hair
How about a rich hair mask to nourish your hair? Sounds like something you need, right? Let’s learn how to make one with fermented rice water and mustard.
Now that we know how to make rice water at home easily, let’s learn about its benefits.
Benefits Of Rice Water For Hair
Rice water contains inositol, a carbohydrate that helps strengthen elasticity and reduce surface friction. Check out here what are the best rice water benefits for hair.
1. Improves Hair Growth

Nothing better than rice water to decrease hair fall and aid hair growth. The amino acids present in rice water, in particular, help in the regeneration of hair and aid faster growth of your hair.
Also, rice water contains vitamins B, C, and E, which further help in hair growth. The best way to use rice water to grow hair is to rinse your hair with it after a wash. Follow the process at least twice a week, and you will surely see the results.
2. Reduces Split Ends
Split ends make you look like a mess, don’t they? Your hair needs protein to avoid split ends, and rice water has plenty of it.
The primary causes of split ends are inadequate maintenance and pollution, which lead to an overall degeneration in the health of your hair. The amino acids present in rice water come to your rescue and repair the damage.
Soak your split ends in rice water for 15 to 20 minutes and then wash your hair. You will gradually see improvement in the condition of your hair.
3. Hair Rinse
Rinsing your hair with rice water after shampooing instead of using a conditioner is the best thing you can do. It improves your hair texture and increases volume. It also tames and smoothens your hair. And, above all, it keeps your hair strong and healthy.
4. Protects Hair From Damage
Rice water decreases surface friction and improves hair elasticity. It contains a carbohydrate called inositol that repairs damaged hair and protects hair in general.
What makes rice water stand apart from other ingredients is the fact that the inositol remains in your hair even after rinsing off the rice water and shields your hair from further damage.
5. Strengthens The Hair Roots And Smoothens Hair

Rice water is rich in amino acids – this is something you already know. You’d be amazed to know that apart from the many benefits that they impart to your hair, they also strengthen your hair roots, add shine to hair, and make it smooth and silky.
6. Cures Dandruff
Dandruff is a menace. It is like a plague attacking your head, leaving a shower of white mist on your clothing. It is utterly embarrassing and a cause of itching and irritation.
Rice water gives you respite from dandruff and, with regular use, helps you combat the problem altogether. For that to happen, you must rinse your hair with rice water regularly.
7. Makes Hair Silky And Shiny
Who doesn’t want silky and shiny hair? It is what we all dream about. And rice water can make it happen. All you have to do is use rice water as a hair mask, leave it on for 20 minutes, and then wash it off.
Follow it up with shampoo and conditioner, and voila! It works even better if you add some rose water to your rice water solution.
8. Removes Lice
Ah, lice! Those tiny creatures are ruining your peace and sucking the blood out of you. Don’t worry because rice water can easily tackle them. The starch in rice water kills the lice and nits instantly.
Rice water nips the problem before it can spread too much and make it worse for you.
9. As A Hair Conditioner

Rice water makes for a good and cost-effective hair conditioner. Add a wee bit of rosemary, lavender, or geranium essential oil to it, and you are good to go.
Apply the solution to the entire length of your hair. Leave it on for anywhere between 10 to 30 minutes and then wash it off with cold water.
Try it because it is an excellent conditioner. I am not simply saying it. Rice water, as a conditioner, repairs your hair, strengthens it, and enhances its elasticity.
Tips To Wash Hair With Rice Water
There are some tips to keep in mind to make your hair wash routine with rice water a fulfilling experience.
Rice water contains natural saponins and can be used as a mild cleanser. But to avoid and remove the build-up of rice water in your hair over time due to hard water, you must add a teaspoon of a natural clarifier like lime, amla, or shikakaito it.
Green tea is also an excellent addition to rice water as it imparts additional shine and strength to your hair. It also reduces hair loss.
Subscribe to:
Comments
(
Atom
)
-
ChomChom Roller Dog Hair Remover, Cat Hair Remover, Pet Hair Remover Revlon One-Step Hair Dryer & Volumizer Hot Air Brush, Black ...
-
10 Remedies And 8 Exercises To Get Rid Of A Double Chin Healifty V Face Band V Line Bandage Breathable Face Lift Belt Anti Wrinkle Ch...


How to moisturize vagina
How to moisturize vagina Vaginal Dryness: Causes and Moisturizing Treatments IN THIS ARTICLE Causes Diagnosis Medication Oth...